Thursday, April 24, 2014

Coop framing

Last weekend I once again had the pleasure of working with my Dad on the chicken coop.  We made great progress, and like the previous week, completed everything I hoped we would, which in my experience, rarely happens.  We finished the remaining three walls, and the outline of the two gable ends. The South wall (on the right in the picture) has two rough openings for windows, and the West wall (on the left) has a rough opening for a person door.  The chicken door will be cut out of the siding on the back and finished with trim boards.  I didn't bother framing out the opening.


I don't know the terminology for the way I framed the gables, but I opted to do that instead of continuing the studs all the way up to the roof line, mainly because it was easier, and this way I will have something to nail the siding boards to along the top edge.  I had been planning to make the roof a 10/12 pitch, but even with my engineer Dad, we could not figure out how to cut the angles correctly and gave up.  The 12/12 pitch was much easier to cut with a 45 degree angle on both ends!  And the bonus is that I have more head room inside.

Last night I cut out the ridge board and rafters which will rest on top of the gable ends.  I won't make notches in the rafters since they will sit on the outside corner of the wall top plate.  I will cut little right triangles off the ends of a 2x4 to go between the top plate and the rafter.  Pictures to follow.

Now here are the little puff balls that will eventually inhabit this structure.  They are only 1 day old here.


Sunday, April 13, 2014

Chicken coop foundation

This weekend I began building my chicken coop.  I've been researching features and designs all winter, drawing sketches, making minor changes and pondering details of construction.  Last week I had a hearing at the Planning Commission of my city and had my application approved to keep up to four hens.  So in spite of the muddy backyard, I dug the foundations and started building.  Here are the basics of my plan.

1. I will have four hens
2. I decided on the advice of Harvey Ussery in his book "Small Scale Poultry Flock" to build at least 5 square feet of floor space per bird in the coop. I want a little extra space for feed storage, so I made the footprint 4'x6'
3. I want to be able to stand up inside, but not make it so tall as to appear awkwardly tall and skinny, so the wall height will be just under 5' with a gable roof of 6'4" at the peak. I prefer a gable roof instead of a shed roof because I feel the downward sloping eaves will provide better protection from wind and rain, and I want to have ventilation slots under the eaves and on each gable end.
4. There will be an attached run 8'x10' which is double the recommended minimum of 10 square feet per bird.
5. I decided on an "on grade" foundation, using a solid concrete block at each corner set on a 4-6" deep bed of pea gravel.  Here's a great video explaining how to do it; click on "how to build a block foundation for a shed"

Here's a photo sequence of my foundation work.  This took me 3 1/2 hours.

Build the floor joist frame, square up and lay in position
 Lay a concrete block inside each corner to mark the positions
 Move the frame out of the way
 Dig holes a little bigger than each block down to clay/rocky soil
Fill each hole with pea gravel
 Set the blocks and level them by adding or removing gravel
 Set the frame in place, recheck level and measure from corner to corner to square up the frame.  Nail a diagonal board temporarily to keep it square.
 Add floor joists.  The wacky colors and sizes are because I am using as much reclaimed lumber as possible.  I did purchase the pressure treated joists, block and gravel, but the rest of the framing lumber is salvaged from a building that was being gutted.
 Nail down the plywood floor.
The next day my Dad came over and helped me build the first wall.  It was a big help when nailing the studs together and having another person to think about dimensions and measurements (someone who is much better at these things than I am.) It took two of us 2 hours.  The opening in the middle of the wall is for the nest boxes.  Stay tuned for another post next weekend when I hope to put up more walls.


Thursday, November 21, 2013

Winter quarters

I decided to try keeping several potted potential bonsai in the garage this winter instead of having to disturb the roots by pulling them out of their pots and putting them in the ground.  It will also save time in the Spring, if they survive, when I know I'll have to be digging up 7 trees currently growing in the ground where I plan to put in vegetables next year.  There is an East facing window to keep the mugo pine and azalea photosynesizing, and perhaps keep them a little warmer on clear days, which are usually colder.  There is also a large willow branch that I collected during the snow storm in October when so many branches broke off due to the heavy snow load on branches that hadn't lost any leaves yet.  I hope it will root and make a nice big bonsai.

Wednesday, November 20, 2013

A new gate for the hedge

Now that the daylight hours are so short, it's difficult to find time to photograph anything, but I managed to snap these pictures this morning while my car windshield was defrosting.  Everything including the tops of the gate posts, had frost on them, and the grass crunched under my feet.  

I built this gate from tongue and groove floor boards I pulled up out of my sunroom when I gutted it last summer.  I treated the wood with some aerosol waterproofing spray.  The gate looks a little silly with no leaves on the hedge plants, but I'm happy with how it turned out.  I will need to reshape one of the branches that forms the arch over the opening, as it cuts across the nice circular shape framed by the gate and the arched opening.

 Here's the gate from the other side, looking through my deer fencing.  You can see the black plastic I laid down over a thick layer of straw to kill all the weeds and grass inside the fenced area.

Saturday, September 28, 2013

Mature Hornbeam Hedge

When I planted this hedge in Spring of 2008, I had seen a decades old European Hornbeam hedge and was inspired to do the same in my backyard.  My neighbor had erected a privacy fence that ended about 10' short of the back of my garage, so I decided to fill in the gap with American Hornbeam, Carpinus Caroliana.  I had no idea it would grow so fast.

Here is my hedge in September 2013
I've pruned it once earlier this summer to keep it away from the electric and phone wires, but it has swallowed them up again already.  I am going to put in a gate to keep the deer from using it as their own private entrance to my backyard.
Our vegetable garden is enclosed with a 7' high fence that runs parallel to the wooden privacy fence. There is no access to the enclosure from the hedge entrance, but there is a narrow path outside it leading to the back yard.  You can see a previous post about the hedge here.


Thursday, August 8, 2013

Azalea follow up

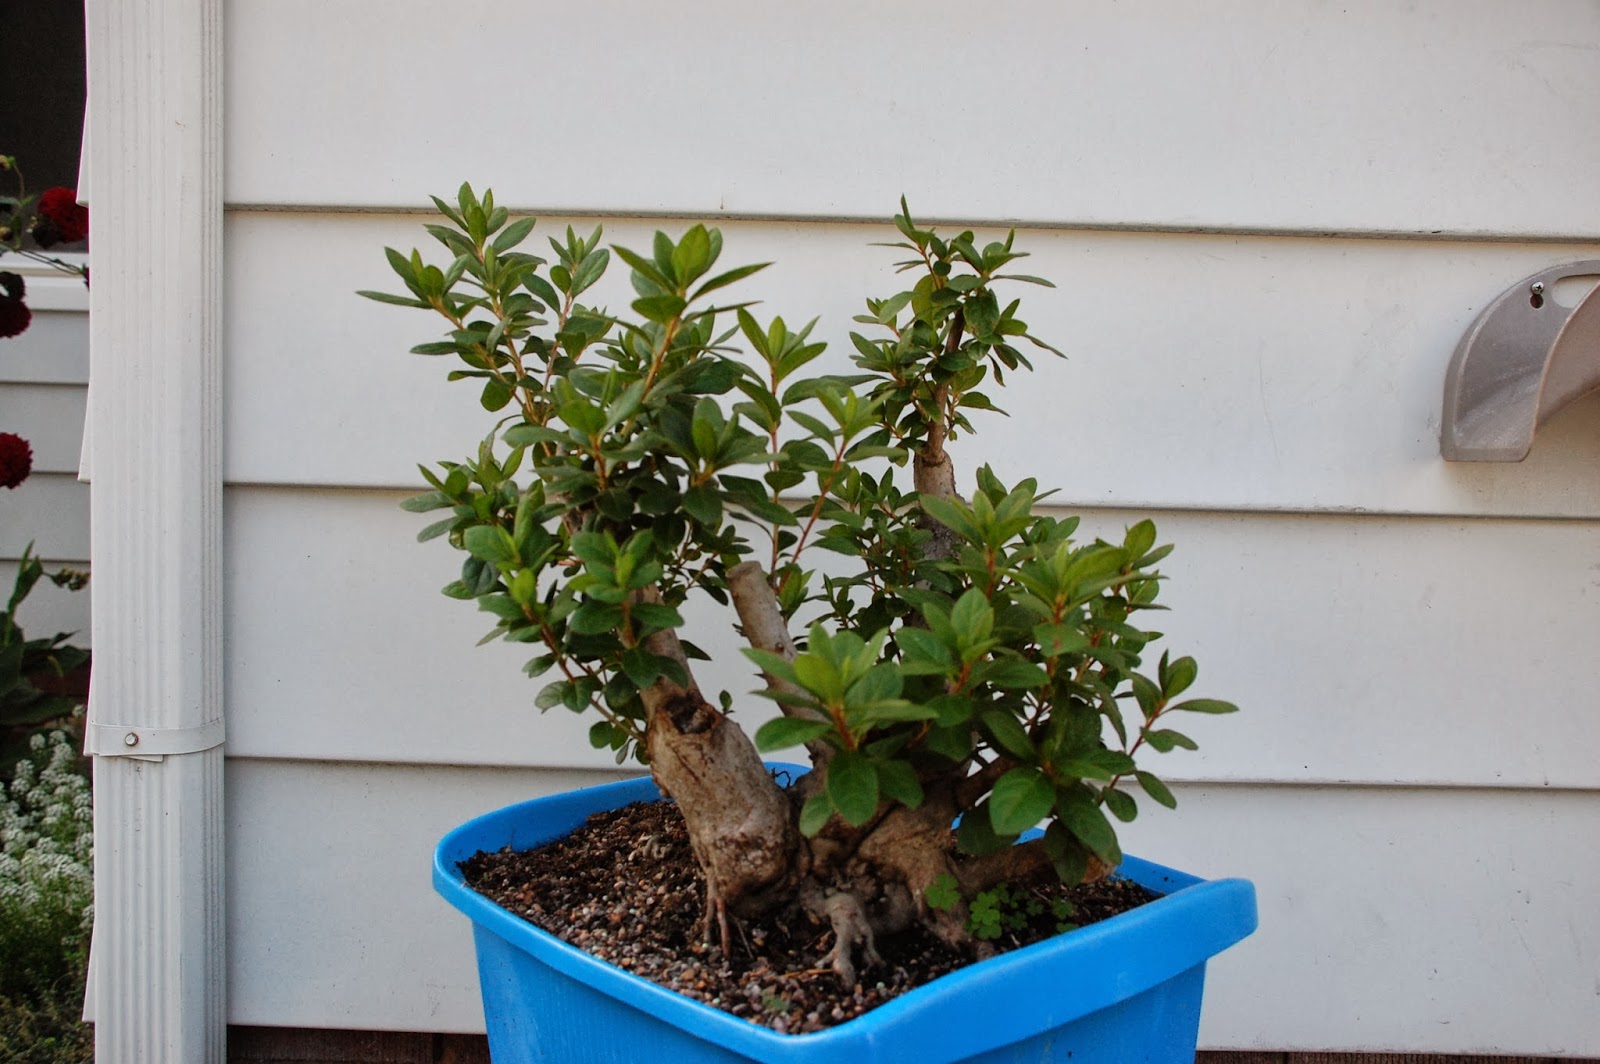
I identified this azalea as a potential bonsai last winter.  It had previously been dug up and plunked in some muddy ground in the back of the yard, but had produced lots of new growth and was flourishing several years later.  I noticed it has some nice gnarly trunks and surface roots, so after the blooms fell off in June 2013, I dug it up.
Here it is after root pruning to remove any dead roots or roots that were too long.  I also heavily pruned the branches again.
It took a long time, probably 3-4 weeks, for new growth to appear, but it eventually did produce lots of new branches.
I then selected which new branches to keep and removed the rest.  I basically kept two branches at each point, removing any the grew out of the top or bottom of the branches, keeping only those coming out of the sides.  I also tried to balance the size of the branches, removing ones that were very vigorous or very weak unless I really needed a branch in a specific position.  Because of how late it is in the year now, I will wait to do any further pruning until next year.  Given how slow it was to back bud, I am afraid if I were to prune it again now, the new growth prompted by the pruning wouldn't have time to harden off before Winter.
The new growth was quick to fill in, so I did end up pruning back several of the more vigorous shoots in late August.  Here it is on October 21st.

Here is a previous post with inspirational pictures of other azalea bonsai.  None of them are exactly what I want, but give some ideas.

Wednesday, June 19, 2013

Hornbeam root over rock bonsai

Before I introduce my tree, I'll show a few root-over-rock bonsai that inspire me.  This little English Elm belongs to Harry Harrington and he has written a very informative photo progression series on this tree. Also check out his photo series from the Philippine Bonsai & Suiseki exhibit for some very unusual and interesting examples of this and other bonsai styles.

This juniper was featured on Bonsai Eejit.  I can just picture this growing along the Minister Creek in the Allegheny National Forest, where I've backpacked extensively, although in Western Pennsylvania it would be more likely to see a hemlock.  
DSC_0060
Here's my hornbeam (carpinus caroliniana) growing on a chunk of rock from Seneca Rocks in West Virginia.  When I was a resident assistant at Grove City College, a freshman in my dorm went climbing there, and brought it back for me since he knew I liked rock climbing.  I thought it appropriate to give in more monumental stature by growing a tree over it.
The first two years this was in a pot, but the trunk wasn't thickening up as much as I'd like, so I plan on leaving it in the ground another year.  In late winter 2014 I will chop the trunk back below the lowest branch and start developing a new branch structure.
By October 21st, the trunk and branches had thickened up quite a lot more than in June.  Here is a shot from what I think will be the front.
 And here are some nice fall colors.