Wednesday, June 19, 2013

Hornbeam root over rock bonsai

Before I introduce my tree, I'll show a few root-over-rock bonsai that inspire me.  This little English Elm belongs to Harry Harrington and he has written a very informative photo progression series on this tree. Also check out his photo series from the Philippine Bonsai & Suiseki exhibit for some very unusual and interesting examples of this and other bonsai styles.

This juniper was featured on Bonsai Eejit.  I can just picture this growing along the Minister Creek in the Allegheny National Forest, where I've backpacked extensively, although in Western Pennsylvania it would be more likely to see a hemlock.  
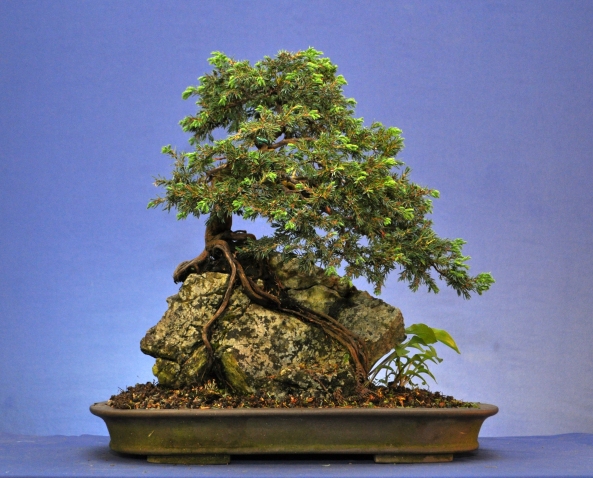
DSC_0060
Here's my hornbeam (carpinus caroliniana) growing on a chunk of rock from Seneca Rocks in West Virginia.  When I was a resident assistant at Grove City College, a freshman in my dorm went climbing there, and brought it back for me since he knew I liked rock climbing.  I thought it appropriate to give in more monumental stature by growing a tree over it.
The first two years this was in a pot, but the trunk wasn't thickening up as much as I'd like, so I plan on leaving it in the ground another year.  In late winter 2014 I will chop the trunk back below the lowest branch and start developing a new branch structure.
By October 21st, the trunk and branches had thickened up quite a lot more than in June.  Here is a shot from what I think will be the front.
 And here are some nice fall colors.


Twisted Trunk Privet

After Isaac helped me bare-root the five privets (grown from volunteer seedlings and transplanted to my garden for 3 years) I began the process of pruning them each down to one trunk and removed lots of branches. 
 I then carefully fitted them together and attached them where necessary with tiny brass screws.  The trunks weren't very flexible but I managed to twist them a little bit at the base.  There is a band of electrical tape about 10" high where I ran out of #2 brass screws.  Here is the bundle of trees with a thick mass of roots before potting.
Here it is in a recent photo showing strong growth in all five trunks.  It is potted in a milk crate lined with a trash bag (with holes in all four corners and the middle of the bottom for drainage)
There are many shoots coming out near the base too, which is fine, as that will help thicken up the trunks and  hopefully they will begin to fuse together with time.  I expect to be able to remove the screws next Spring as the trunks will have set in their new positions and won't risk unwinding.  They could be removed this Fall, but the holes wouldn't heal over until Spring anyway.  Click here for some of my inspiration photos for a twisted trunk bonsai.
In October I removed the plant from its pot and cut off the bottom two inches of the root mass.  I decided to plant it in the ground so the trunks will all thicken up and fuse together.  I planted it on a tile to encourage sideways growth.


Friday, June 14, 2013

Mugo pine bonsai inspiration

This is a small Mugo Pine I got at HD two years ago.  I've been quite conservative about any drastic changes so far.  When I first got it in early Summer 2011, I cut off the bottom 1/3 of the root ball and removed some branches. I planted it in the ground that fall and left it there all last summer.  This Spring I had to move it to make room for other things, so I dug it up and put it in a pot being careful not to disturb the roots, as the internet wisdom seems to be the best time to repot and root prune a Mugo is in mid summer.  

I had originally thought the picture below would be the front, because the lowest branch on the left has an interesting twist in it, but I now see that the lowest right and left branches are at the same level and create an unattractive "bar".
I am now more strongly leaning toward this being the front since the branches are at different heights.  Later this summer I will rake out the surface roots to see if there are any more interesting thicker roots I can expose.
I didn't uncover a strong root spread, but there is one moving diagonally down to the left that I think will thicken as the bottom of the rootball is gradually reduced.  This strong movement of a root to the left should inform the movement of the branches once I start wiring it.  I would think most of the branch movement should be to the right, but there is only one small branch on the right side.  The other problem is that what I am thinking of as the front has a branch coming straight out toward the viewer.  I think I will try bending that branch to the left and down. Also, the trunk has bulges where the branches come out.  This I may correct by making a shari on the trunk to reduce the bulge. 

Any suggestions would be welcome!

The next two pictures are of a similar sized pine I found in Yosemite last year and found it inspiring as a model for my bonsai.  It's hard to see the branch structure, but it's hard to beat the background!


Here's a Mugo bonsai that I really admire: