Thursday, November 21, 2013

Winter quarters

I decided to try keeping several potted potential bonsai in the garage this winter instead of having to disturb the roots by pulling them out of their pots and putting them in the ground.  It will also save time in the Spring, if they survive, when I know I'll have to be digging up 7 trees currently growing in the ground where I plan to put in vegetables next year.  There is an East facing window to keep the mugo pine and azalea photosynesizing, and perhaps keep them a little warmer on clear days, which are usually colder.  There is also a large willow branch that I collected during the snow storm in October when so many branches broke off due to the heavy snow load on branches that hadn't lost any leaves yet.  I hope it will root and make a nice big bonsai.

Wednesday, November 20, 2013

A new gate for the hedge

Now that the daylight hours are so short, it's difficult to find time to photograph anything, but I managed to snap these pictures this morning while my car windshield was defrosting.  Everything including the tops of the gate posts, had frost on them, and the grass crunched under my feet.  

I built this gate from tongue and groove floor boards I pulled up out of my sunroom when I gutted it last summer.  I treated the wood with some aerosol waterproofing spray.  The gate looks a little silly with no leaves on the hedge plants, but I'm happy with how it turned out.  I will need to reshape one of the branches that forms the arch over the opening, as it cuts across the nice circular shape framed by the gate and the arched opening.

 Here's the gate from the other side, looking through my deer fencing.  You can see the black plastic I laid down over a thick layer of straw to kill all the weeds and grass inside the fenced area.

Saturday, September 28, 2013

Mature Hornbeam Hedge

When I planted this hedge in Spring of 2008, I had seen a decades old European Hornbeam hedge and was inspired to do the same in my backyard.  My neighbor had erected a privacy fence that ended about 10' short of the back of my garage, so I decided to fill in the gap with American Hornbeam, Carpinus Caroliana.  I had no idea it would grow so fast.

Here is my hedge in September 2013
I've pruned it once earlier this summer to keep it away from the electric and phone wires, but it has swallowed them up again already.  I am going to put in a gate to keep the deer from using it as their own private entrance to my backyard.
Our vegetable garden is enclosed with a 7' high fence that runs parallel to the wooden privacy fence. There is no access to the enclosure from the hedge entrance, but there is a narrow path outside it leading to the back yard.  You can see a previous post about the hedge here.


Thursday, August 8, 2013

Azalea follow up

I identified this azalea as a potential bonsai last winter.  It had previously been dug up and plunked in some muddy ground in the back of the yard, but had produced lots of new growth and was flourishing several years later.  I noticed it has some nice gnarly trunks and surface roots, so after the blooms fell off in June 2013, I dug it up.
Here it is after root pruning to remove any dead roots or roots that were too long.  I also heavily pruned the branches again.
It took a long time, probably 3-4 weeks, for new growth to appear, but it eventually did produce lots of new branches.
I then selected which new branches to keep and removed the rest.  I basically kept two branches at each point, removing any the grew out of the top or bottom of the branches, keeping only those coming out of the sides.  I also tried to balance the size of the branches, removing ones that were very vigorous or very weak unless I really needed a branch in a specific position.  Because of how late it is in the year now, I will wait to do any further pruning until next year.  Given how slow it was to back bud, I am afraid if I were to prune it again now, the new growth prompted by the pruning wouldn't have time to harden off before Winter.
The new growth was quick to fill in, so I did end up pruning back several of the more vigorous shoots in late August.  Here it is on October 21st.

Here is a previous post with inspirational pictures of other azalea bonsai.  None of them are exactly what I want, but give some ideas.

Wednesday, June 19, 2013

Hornbeam root over rock bonsai

Before I introduce my tree, I'll show a few root-over-rock bonsai that inspire me.  This little English Elm belongs to Harry Harrington and he has written a very informative photo progression series on this tree. Also check out his photo series from the Philippine Bonsai & Suiseki exhibit for some very unusual and interesting examples of this and other bonsai styles.

This juniper was featured on Bonsai Eejit.  I can just picture this growing along the Minister Creek in the Allegheny National Forest, where I've backpacked extensively, although in Western Pennsylvania it would be more likely to see a hemlock.  
DSC_0060
Here's my hornbeam (carpinus caroliniana) growing on a chunk of rock from Seneca Rocks in West Virginia.  When I was a resident assistant at Grove City College, a freshman in my dorm went climbing there, and brought it back for me since he knew I liked rock climbing.  I thought it appropriate to give in more monumental stature by growing a tree over it.
The first two years this was in a pot, but the trunk wasn't thickening up as much as I'd like, so I plan on leaving it in the ground another year.  In late winter 2014 I will chop the trunk back below the lowest branch and start developing a new branch structure.
By October 21st, the trunk and branches had thickened up quite a lot more than in June.  Here is a shot from what I think will be the front.
 And here are some nice fall colors.


Twisted Trunk Privet

After Isaac helped me bare-root the five privets (grown from volunteer seedlings and transplanted to my garden for 3 years) I began the process of pruning them each down to one trunk and removed lots of branches. 
 I then carefully fitted them together and attached them where necessary with tiny brass screws.  The trunks weren't very flexible but I managed to twist them a little bit at the base.  There is a band of electrical tape about 10" high where I ran out of #2 brass screws.  Here is the bundle of trees with a thick mass of roots before potting.
Here it is in a recent photo showing strong growth in all five trunks.  It is potted in a milk crate lined with a trash bag (with holes in all four corners and the middle of the bottom for drainage)
There are many shoots coming out near the base too, which is fine, as that will help thicken up the trunks and  hopefully they will begin to fuse together with time.  I expect to be able to remove the screws next Spring as the trunks will have set in their new positions and won't risk unwinding.  They could be removed this Fall, but the holes wouldn't heal over until Spring anyway.  Click here for some of my inspiration photos for a twisted trunk bonsai.
In October I removed the plant from its pot and cut off the bottom two inches of the root mass.  I decided to plant it in the ground so the trunks will all thicken up and fuse together.  I planted it on a tile to encourage sideways growth.


Friday, June 14, 2013

Mugo pine bonsai inspiration

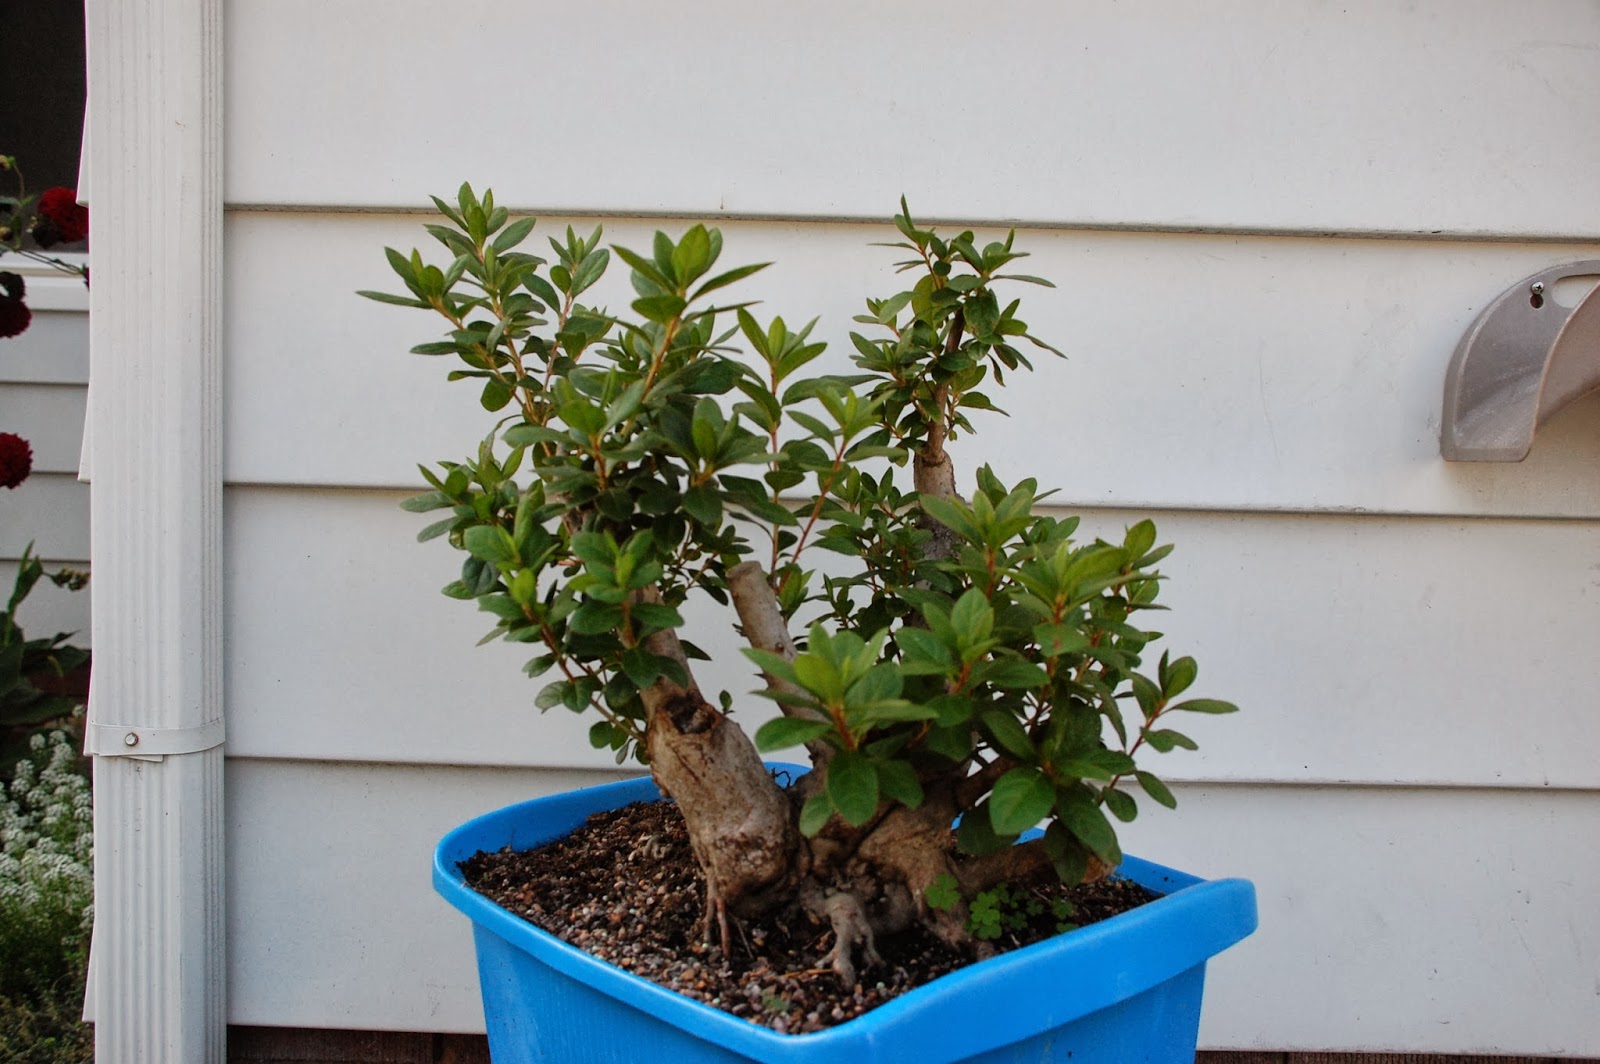
This is a small Mugo Pine I got at HD two years ago.  I've been quite conservative about any drastic changes so far.  When I first got it in early Summer 2011, I cut off the bottom 1/3 of the root ball and removed some branches. I planted it in the ground that fall and left it there all last summer.  This Spring I had to move it to make room for other things, so I dug it up and put it in a pot being careful not to disturb the roots, as the internet wisdom seems to be the best time to repot and root prune a Mugo is in mid summer.  

I had originally thought the picture below would be the front, because the lowest branch on the left has an interesting twist in it, but I now see that the lowest right and left branches are at the same level and create an unattractive "bar".
I am now more strongly leaning toward this being the front since the branches are at different heights.  Later this summer I will rake out the surface roots to see if there are any more interesting thicker roots I can expose.
I didn't uncover a strong root spread, but there is one moving diagonally down to the left that I think will thicken as the bottom of the rootball is gradually reduced.  This strong movement of a root to the left should inform the movement of the branches once I start wiring it.  I would think most of the branch movement should be to the right, but there is only one small branch on the right side.  The other problem is that what I am thinking of as the front has a branch coming straight out toward the viewer.  I think I will try bending that branch to the left and down. Also, the trunk has bulges where the branches come out.  This I may correct by making a shari on the trunk to reduce the bulge. 

Any suggestions would be welcome!

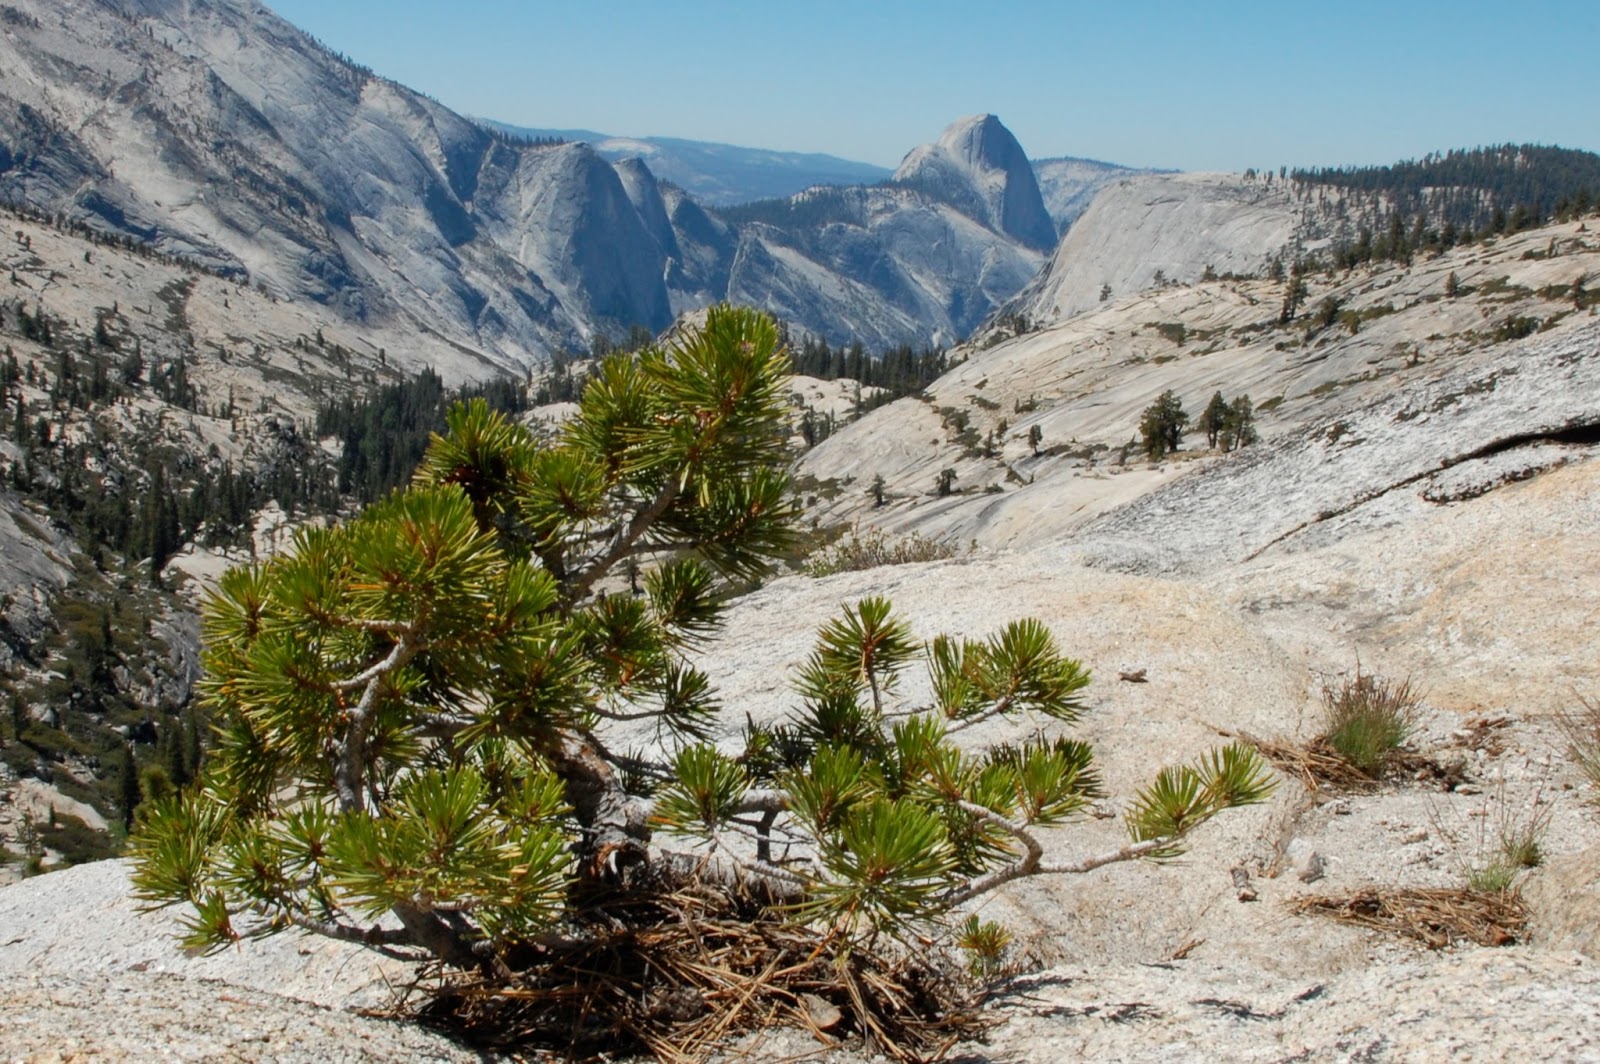
The next two pictures are of a similar sized pine I found in Yosemite last year and found it inspiring as a model for my bonsai.  It's hard to see the branch structure, but it's hard to beat the background!


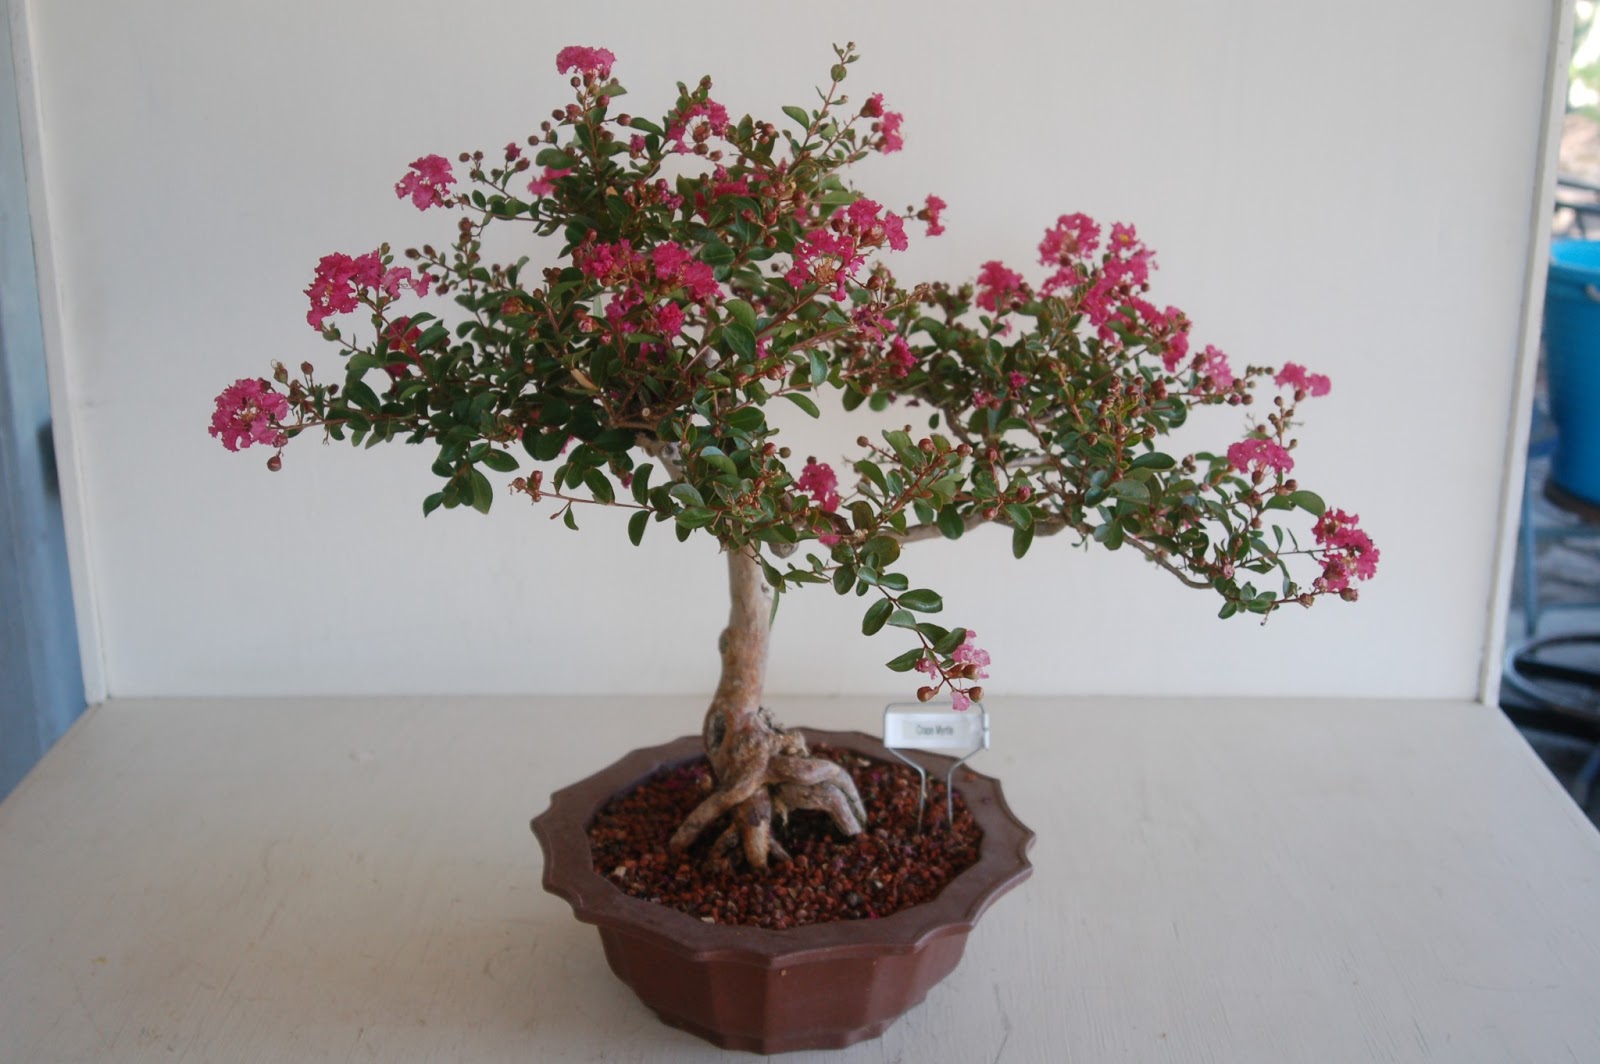
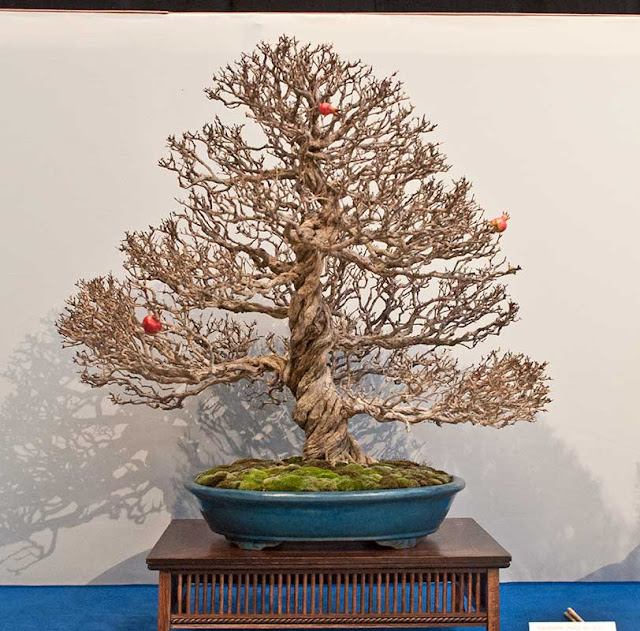
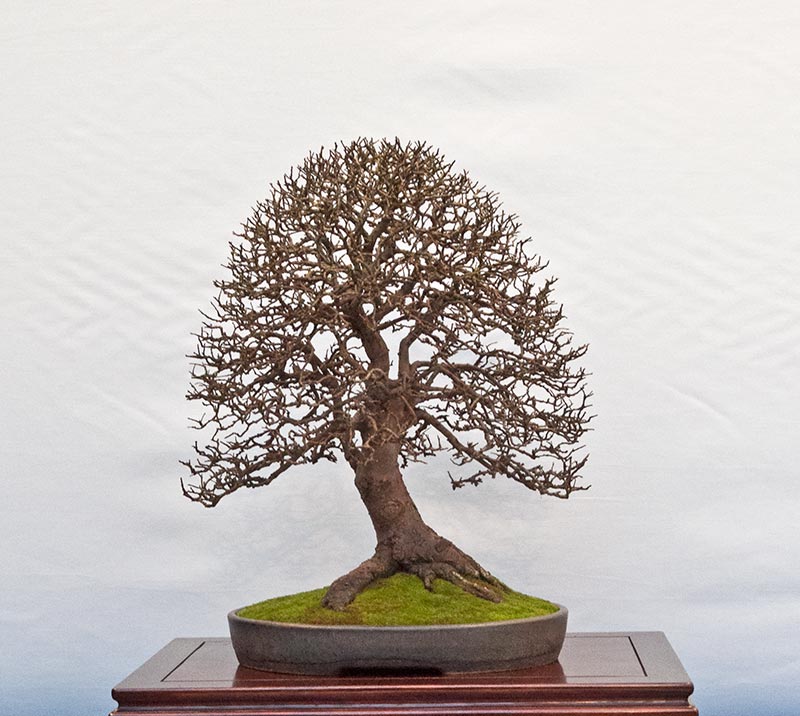
Here's a Mugo bonsai that I really admire:


Tuesday, May 28, 2013

Crepe Myrtle bonsai inspiration

This ugly picture is of a crepe myrtle I have growing in a wooden box, and is overwintering in my root cellar, where it stays between about 38 - 50 degrees F all winter.
I haven't found many examples online of crepe myrtle bonsai that I like, but here are a few that have some potential.

This Spring I removed it from its grow box and trimmed the bottom of the roots. I improved the drainage of the pot by cutting a 1" wide slot most of the length of the box, and stapled some fiberglas screen over it to keep the soil in.  I added 2-3" of new soil in the bottom, since it was a little low in the pot, and replaced it in the box.  I am hoping it will add enough girth to the trunk that I can chop the trunk next winter and begin to train it as a bonsai.  I'm tired of bringing that huge pot into the basement every winter.


I may have identified this as the 'Potomac' cultivar of Lagerstroemia indica.
For some reason it did not bloom this year, possibly resulting from our cool wet summer.  It also did not add any girth to its trunk either, which is very disappointing to me.  I think I will try keeping it in my detached garage this winter, surrounding the box with bales of straw.  This will avoid having to haul it down to the basement.

Isaac's honesty

Tonight I was working in the garden trying to prep a raised bed for plating watermelon.  This involved wheel barrow trips to the compost pile, dumping peat moss and sand, and mixing with a pitch fork.  As I was working Mindy was following me around and talking to me,  and asking me what I was doing.  I really love it when she comes out to see what I'm doing in the yard, taking an interest in my gardening.  It really makes me feel loved since I know she doesn't share my enthusiasm for endless yard work.

Poor Isaac though, he wanted to help or be involved.  I tried to let him do some things, but generally he got in the way and he had to be asked to back off several times.  He began intentionally grabbing things and being a nuisance until finally I picked him up and said, "Isaac! why are you doing these things?  Are you needing attention?"  Isaac very sadly and pitifully said, "Yes, I do need attention.  Can you attensh me by coming inside to play with me?"I just love the way mind works, making up words to try to fit patterns he hears!
In spite of the interruptions, I have finally (almost) finished the deer fence, and planted most of the vegetable seeds and seedlings I started indoors.


Tuesday, April 16, 2013

Root washing

Isaac learned how to bare-root a tree tonight.  He was very into it.  My four year old is learning how to create bonsai, how cool is that?  
I've been growing these privets behind my garage for several years since I found them as seedlings under an arbor where I assume birds deposited the seeds after having eaten the berries.  I wasn't sure what I was going to do with them, so I planted them in an empty bed to grow until I decided whether to use them in a hedge or create a bonsai.  They are about 4 feet tall and 1/2 - 3/4" thick.  I want to use the bed for vegetable gardening now, so they need to go.  I decided to try to twist some or all of them together to form a fused trunk tree.  I imagine it looking something like this...

Or more likely this...
...depending on how flexible the trunks are when I try to twist them, and how securely I'm able to fasten them together.  I expect it to take 2-3 years before the trunks become fully fused together.  I'll post more details about how I do it with pictures hopefully later this week.  It's been a challenge getting anything done in the yard over the last week because of the rain.  I have post holes sitting full of water waiting to dry out so I can set the posts for a deer fence.

Monday, January 28, 2013

Spruce bonsai inspiration

This is a Norway Spruce grown by a friend from seed about five years ago.  When I got it, it was growing in a three gallon pot.  I removed it from the pot, cut off about 2/3 of the root ball and planted it  in the ground on a tile in Summer of 2011.  The nebari (surface roots) and trunk base have both increased noticeably in size since then and the trunk just above the root flare is now1 3/8" in diameter.  I would like it to be at least 2" before I start training it as a bonsai, so I expect to leave it in the ground another two years to thicken up.  I do plan on pruning the roots on two sides this Spring, and the other two sides next Spring to prepare it for digging up the following year.


I think you can see from this picture that the trunk does have some nice movement.  I can increase the taper after chopping it down and carving the tip into a deadwood "snag top".
Here's the tree in October with Isaac (40" tall).  The trunk caliper is now 2" so I'm torn whether to give it another year in the ground or dig it up next Spring and put it  in a training pot.  I'd like it to be 2 1/2" for a finished height of 19".  


I photographed these two trees in Yosemite last summer, and I think they may serve as models for the bonsai.


Here are two spruce bonsai that I really admire, because I think they capture and epitomize the qualities I've seen in a lot of wild Spruces.


Friday, January 25, 2013

Noelanders Trophy via Walter Pall

Here are some images of bonsai from the recent Noelanders Trophy, bonsai extravaganza in Belgium.  With the exception of the last two pictures, these were taken by Walter Pall and posted on his blog.  I picked out 9 trees as my favorites from about 120.  None of my favorites are prize winners, but I find them somehow more believable as real trees than the two deciduous prizewinners which I post last.  I liked the conifer winners even less.  The two winning deciduous tree images are from Bonsai Eejit


And the winners are...
 Second prize (which I like better than the first prize) 
Acer palmatum by Udo Fisher

First prize, Fagus crenata by Luis Vallejo
I feel this is too perfectly shaped.  I like to see more irregularity, but none the less, it's still a beautiful tree.